Exposure Triangle

Hello LLC members,

In three previous posts I covered Aperture (f-stop) , Shutter Speed (Time Value) and ISO (film/digital sensor sensitivity) these are the key settings to obtaining a proper Exposure Value.

But wait, these are also the key settings to creative photography as well. Once you get a handle on the trade-offs when using these settings in combination the creative possibilities are endless.

The simplest way to show this relationship of Aperture, Shutter Speed & ISO is the    Exposure Tri-angle

exposure_triangle2

As you can see in this graphic which shows ISO at the top, Shutter speed to the lower left and Aperture lower right. All of them in various combinations influence Exposure Value in the center.

Example:

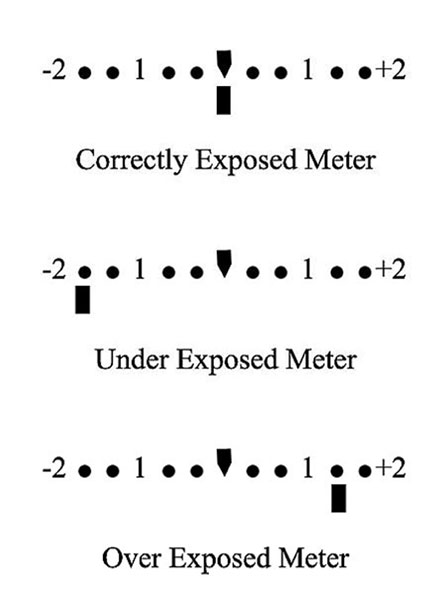
Your ISO is set to 100, Shutter Speed is 1/30 & Aperture is at f/1.8  Your Exposure meter indicates a value of +1

Which is Over Exposed!

So what do you adjust to obtain a proper exposure value of  0 ?

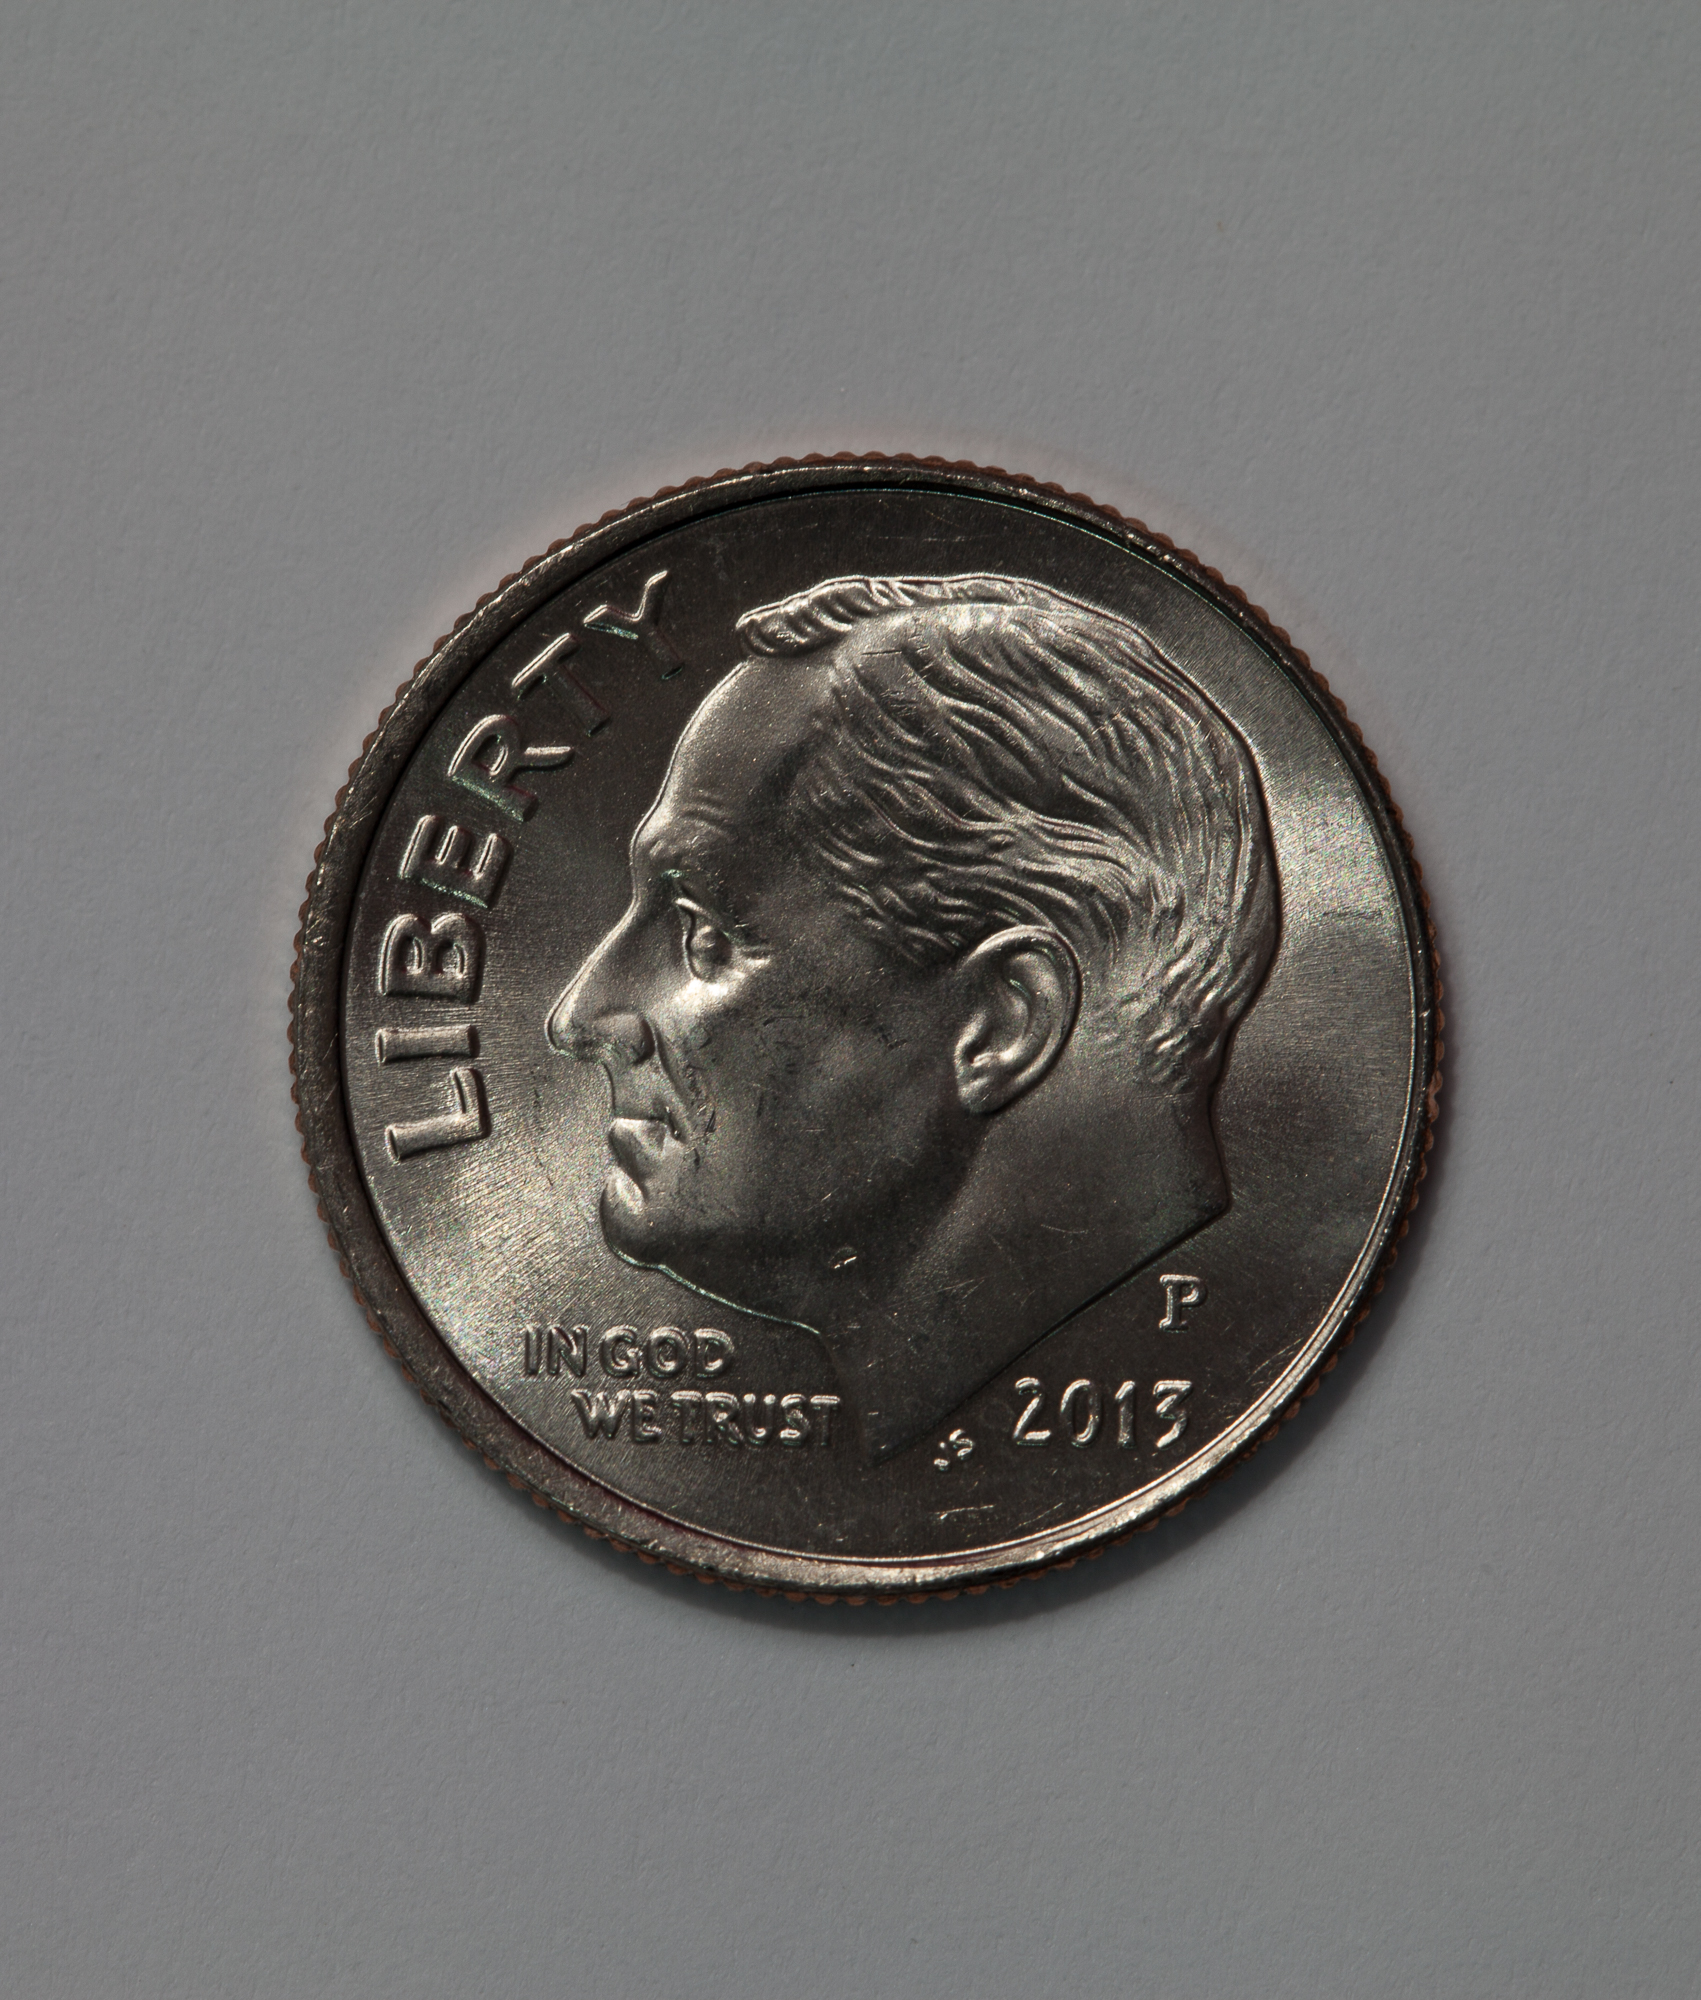
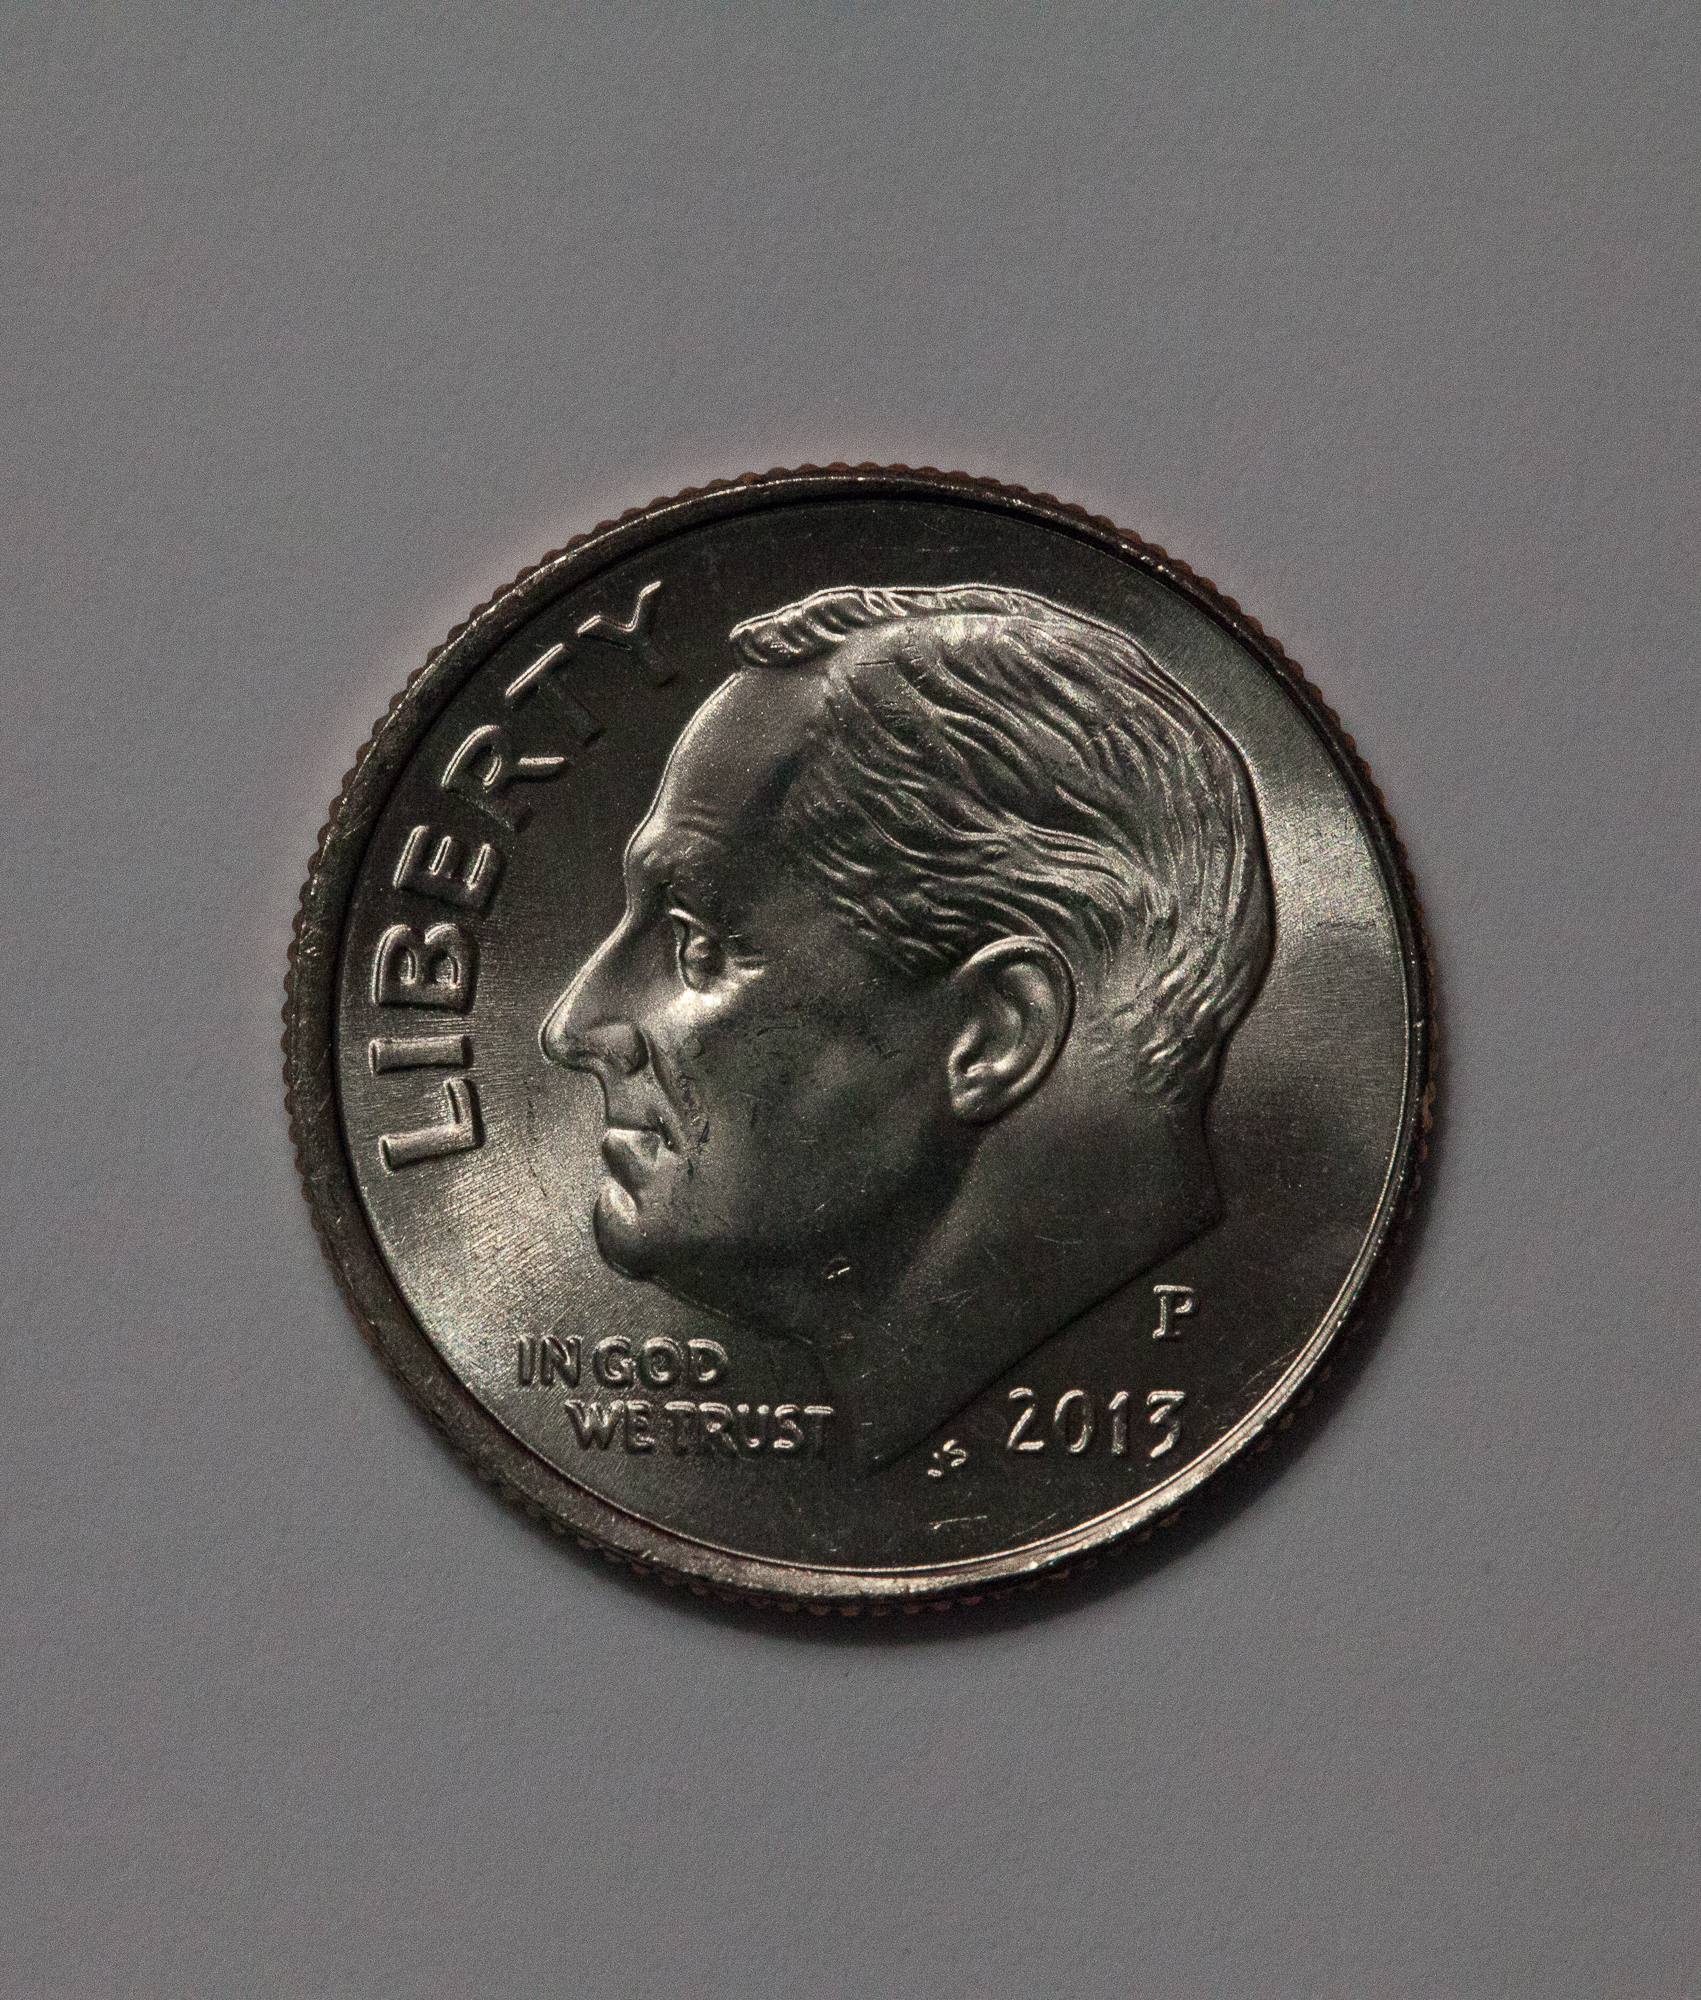
Ah, here is where your creative side steps in, if you want shallow depth like this

This photo is shot at f1.8 notice how the background is blurred aka shallow Depth of Field (DOF)

This photo is shot at f1.8 notice how the background is blurred aka shallow Depth of Field (DOF)


you would keep the f/1.8 setting and adjust your shutter speed to?

Yes, that’s it you would raise the shutter speed to about 1/60 ( faster shutter speed = less light is hitting the Digital Sensor ) which should provide a proper exposure.

Ok, is this starting to make sense yet?

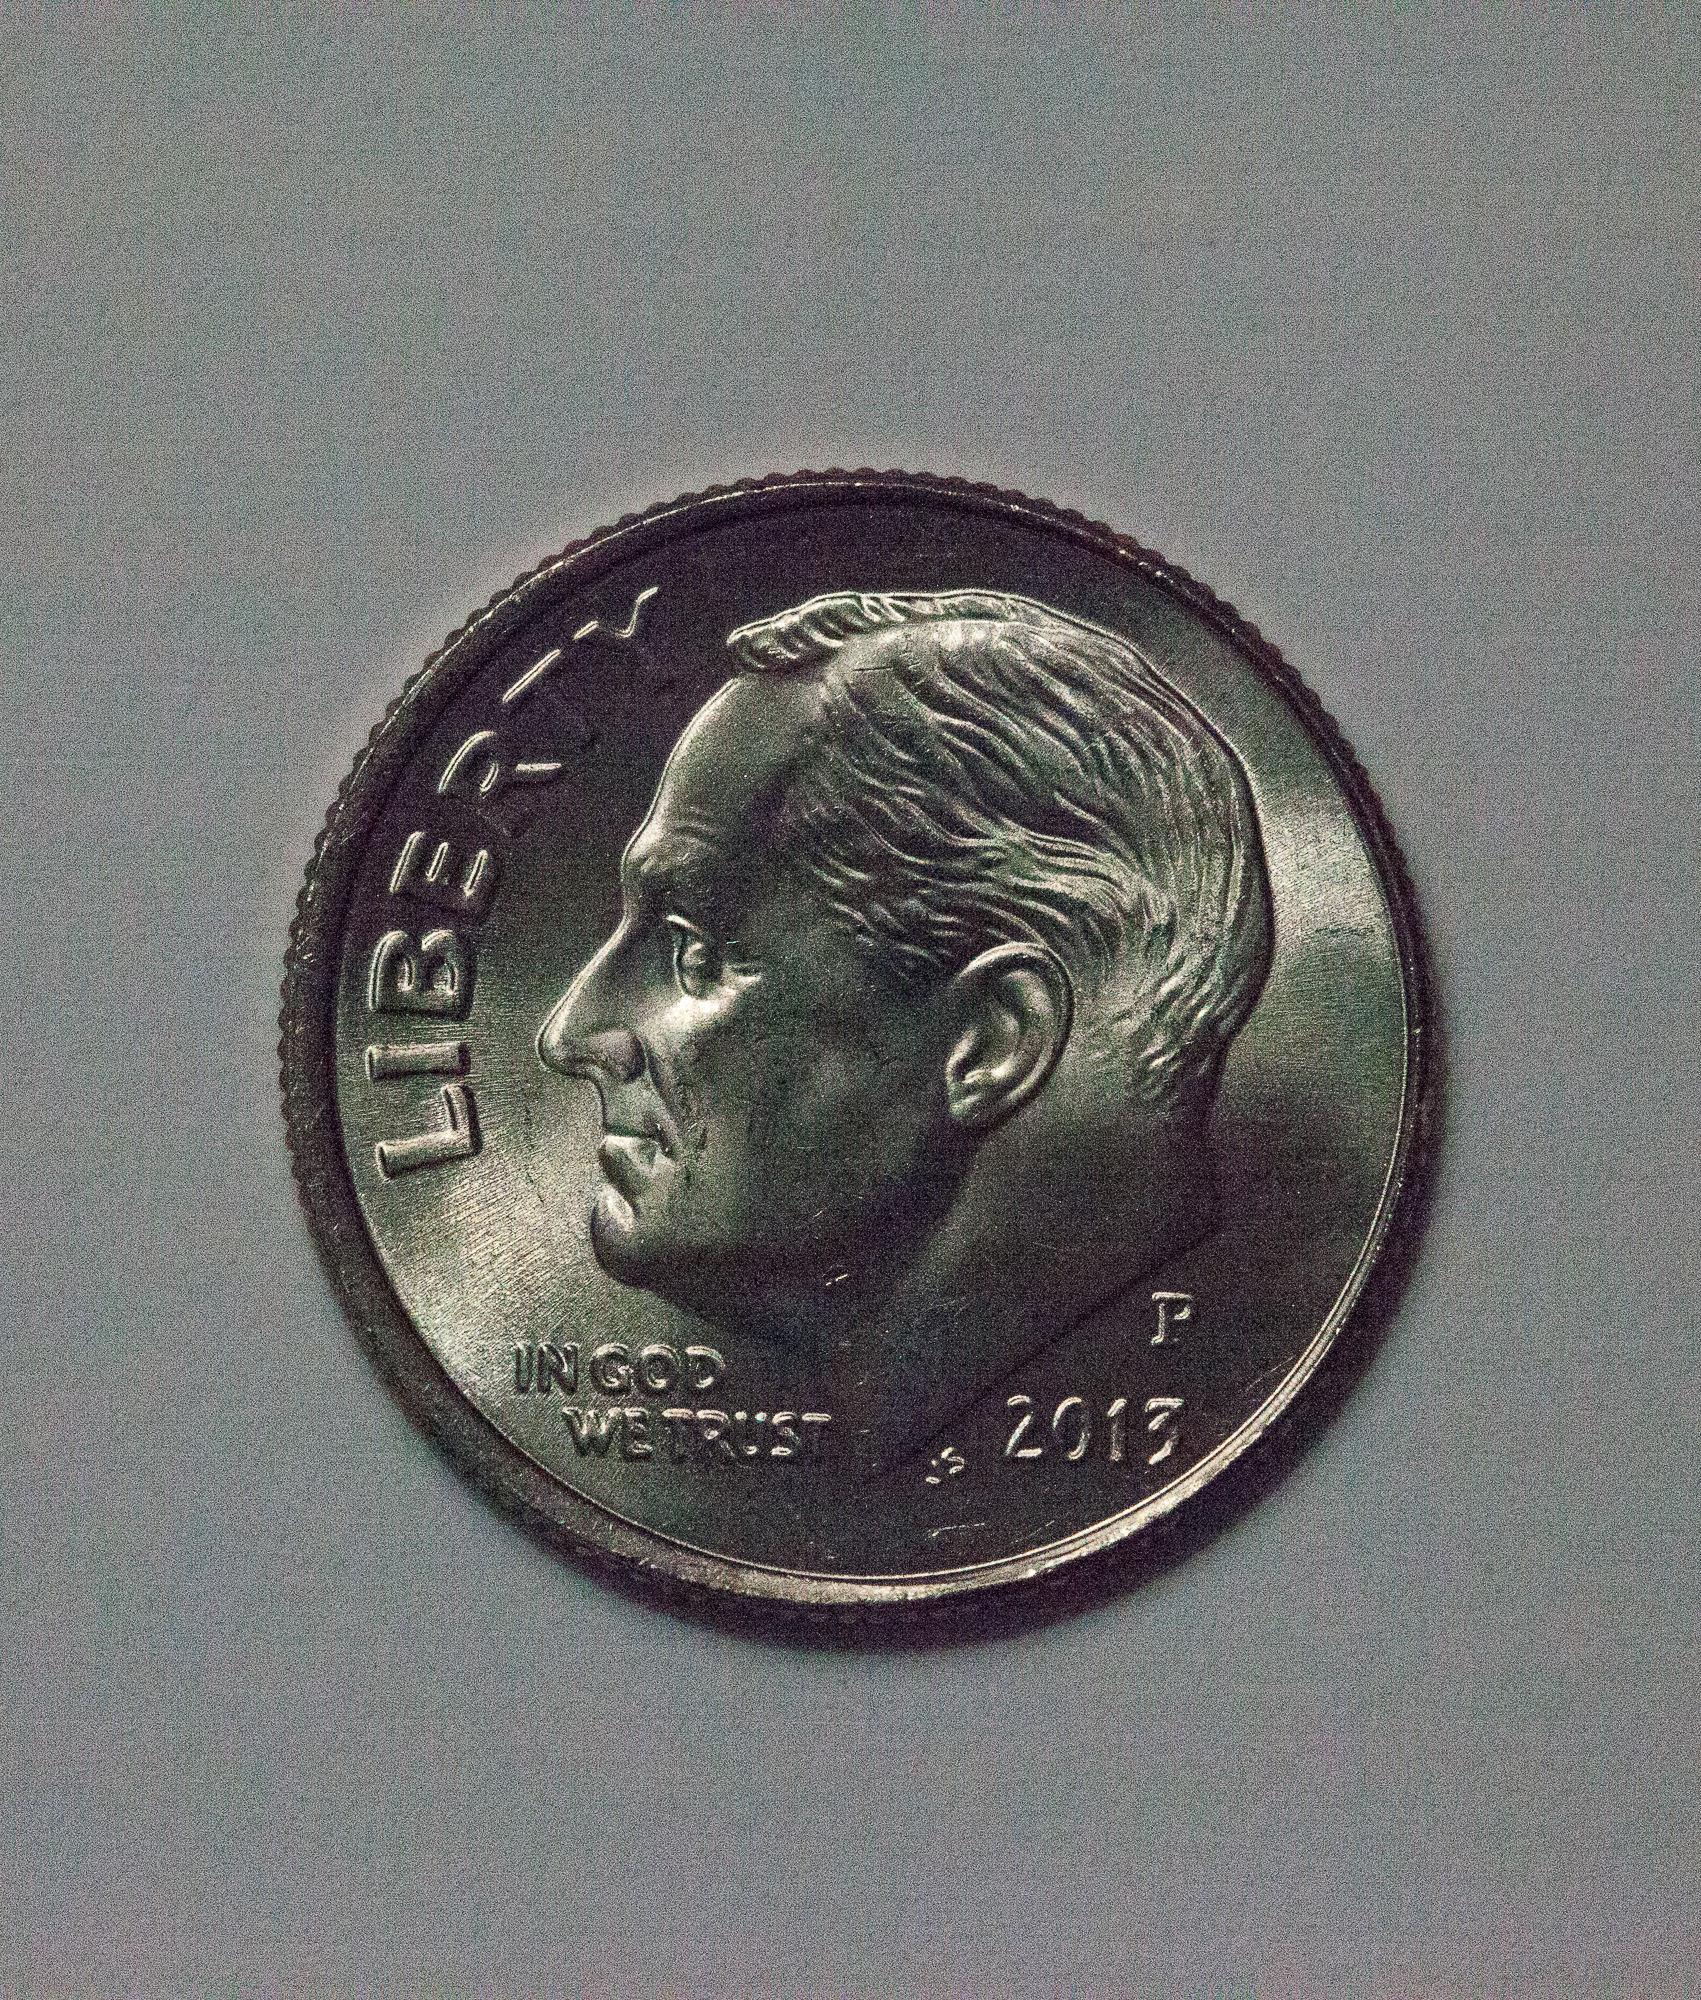
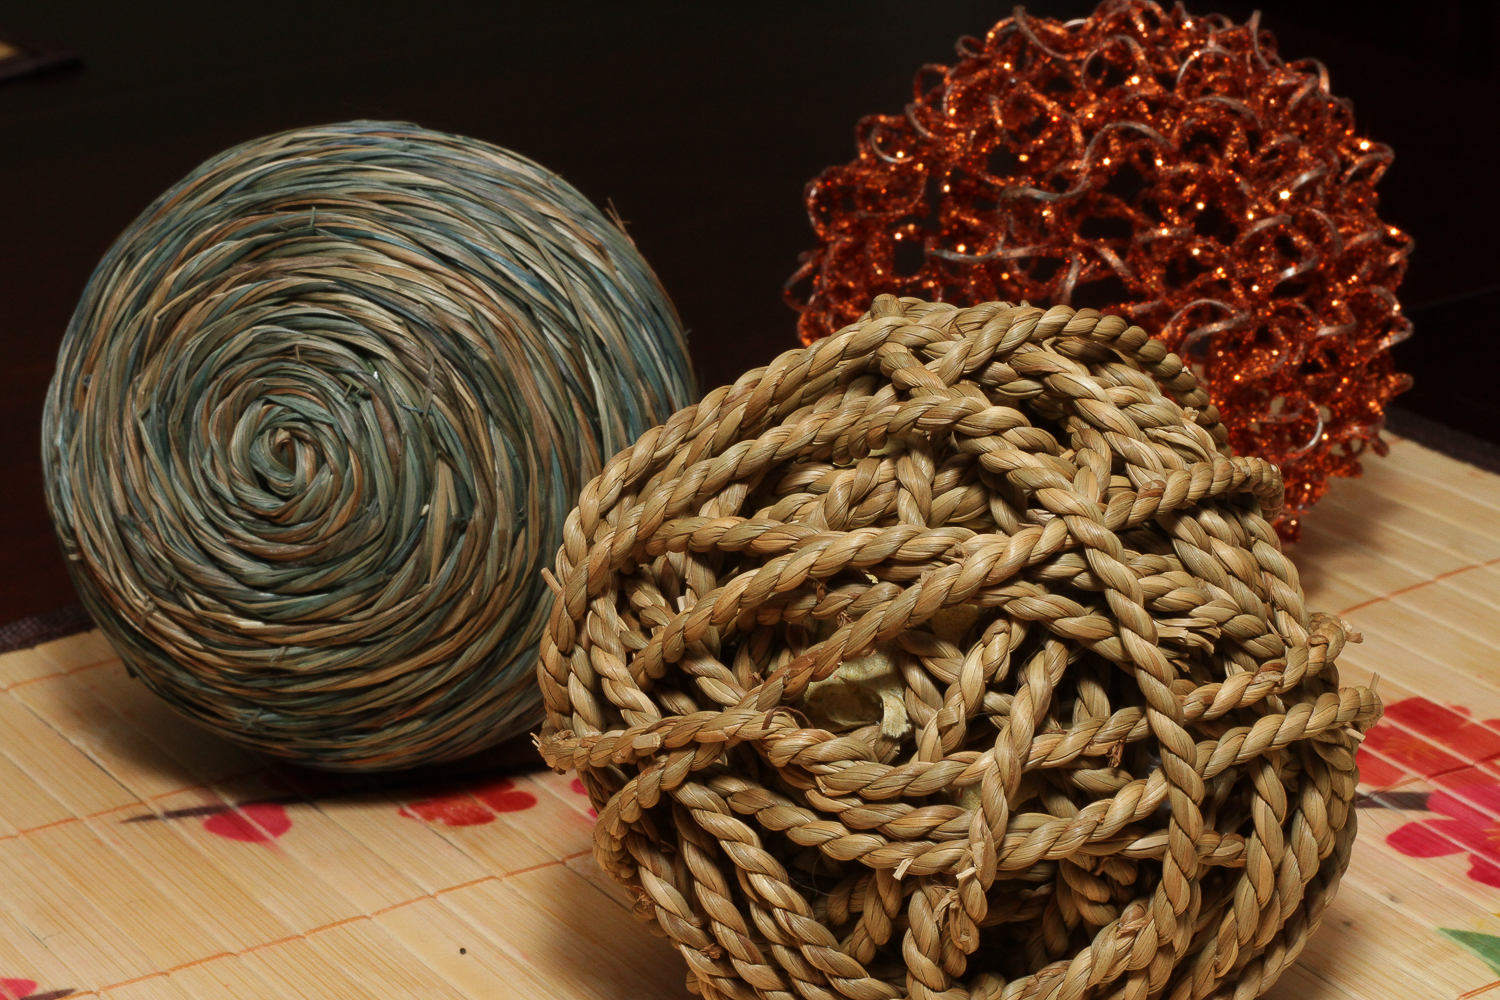
Same scene same light ISO 100 , shutter speed 1/30 but instead you want more Depth of Field (Larger f/# = less light entering the lens ) so  you set the Aperture to f/4 effectivly cutting the light by 1-Stop and bringing the exposure to 0

This photo is shot at f4 notice how less of the background is blurred and more of the scene is coming into view.

This photo is shot at f4 notice how less of the background is blurred and more of the scene is coming into view.

The best way to learn is to put your camera in Manual Mode and play with the settings.

Here is a suggestion:

Put your camera on a tripod in Manual Mode, take some object(s) from around the house put them in different lighting conditions  (bright,dim,& dark) and shoot some photos, adjusting only shutter speed, then adjusting only Aperture, then only adjusting ISO so your light meter shows a perfect exposure value ( 0 )

There is one catch:

If the scene is Extremely Under or Over Exposed you may have to adjust two of the three settings to achieve a proper Exposure Value.

Light-Meter

I also can suggest a great book by Bryan Peterson ” Understanding Exposure “ which I know for a fact is at the Palm Beach County Library because I have checked it out multiple times myself 🙂

-Steve

Check out my photography site dapontephotography

P.S. Please feel free to leave comments or questions


ISO what is it?

In two previous posts Aperture and Shutter Speed we the subjects.

The subject for this post is ISO which is the third factor in controling and setting the desired exposure.

What do the ISO i.e. 50,100,200,400,800 etc. numbers mean?

Back in the days of film you had to choose a film speed ASA Now ISO.  The number indicated the films rated sensitivity to light. Now in Modern Digital Cameras the roll of film has been replaced by a digital CMOS or CCD Sensor. No more need to change a roll of film to change ISO you simply turn a dial 🙂

In todays digital camera the ISO number indicates the digital sensors sensitivity to light. The  only drawback is that when you increase the ISO you decrease the image quality. This is due to digital noise created by the electronics involved. You could compare this to a sound system, you turn the volume up and at a certain point you will get distortion.

In digital photos the noise will slowly introduce a grainy look, if you zoom into a photo shot at high ISO like ISO 1000 something else happens to. The photo will start to have purple splotchy color cast to it. This is digital noise.

That is the trade off when using ISO to increase your ability to capture a handheld shot in low light conditions. So you should first try adjusting your aperture before going for the ISO increase or simply use a tripod.

We will discuss more about the relationship of ISO, Shutter Speed and Aperture in the next post about the Exposure Tri-angle.

Here image examples one at ISO 50, ISO 6400, ISO 25600 shot with a Canon 5D MII & 100mm F2.8 Macro Lens

ISO 50

ISO 50


ISO 6400

ISO 6400


ISO25600

ISO25600 Grainy and purple/blue cast in the image


F-Stop what does it do?

Hello LCC members,

Today I will talk a bit about aperture (f-stop) AV

This little number that can range between f1.2 – f64 depends on your lens. If you look at your lens it will have this number on the lens as either a fixed value for prime lenses or a variable value for zoom lenses i.e. 3.5  – 6.3 . This number indicates how wide open the aperture can be set.

Remember with aperture the lower the number more light enters the lens the higher the number less light enters the lens. So f1.2 is more light and f22 is less light.

Put most simply – Aperture is ‘the opening in the lens. Moving from one f-stop to the next doubles or halves the size of the amount of opening in your lens (and the amount of light getting through).

Now don’t confuse this with shutter speed we will discuss that in another post as well as the exposure triangle.

Here are some photo examples in which I used a 50mm f1.8 prime lens and my focus was set on the ball of string in the front. The only change I made was to the aperture setting.


This photo is shot at f1.8 notice how the background is blurred aka shallow Depth of Field (DOF)

This photo is shot at f1.8 notice how the background is blurred aka shallow Depth of Field (DOF)

This photo is shot at f4 notice how less of the background is blurred and more of the scene is coming into view.

This photo is shot at f4 notice how less of the background is blurred and more of the scene is coming into view.


This photo is shot at f8 now  we can see the items in the background and the depth increases into the image.

This photo is shot at f8 now we can see items in the background a bit clearer  in the image.


This one is shot at f16 again the items further from the lens become clearer.

This one is shot at f16 again the items further from the lens become clearer.

This is shot at f22 which for this lens is the max. Notice that all the items are in clear view from front to back of the image.

This is shot at f22 which for this lens is the max. Notice that all the items are in clear view from front to back of the image.

Learning how to use the aperture setting is a great way to pull the viewers focus to what you want them to look at. For instance in a portrait a low aperture setting between f1.8 or f8 would be a good choice. In a landscape it would be f16 or f22 as you would want to show the entire landscape.

This week take some photos and just change the aperture setting get out of program mode and take control of your image making. If you do not know how to change the setting this would be a good time to find that camera manual.


Better Gear Better Photos?

Hello LCC members,

It seems like my e-mail lately has been filled with announcements about the newest gear. All of the stuff starts off with the promise of better this or that more features better video etc etc.

But you know what?

Here is the bottom line most every camera on the market today captures high quality images. Why do I say that well it is a fact if Canon,Nikon,Pentax,Sony and the list goes on did not capture great images they would go out of business. That’s right it is a business that has to ride that perpetual circle of more, better and faster.

But, you must ask yourself how much more, better and faster do you really need?

The camera is just a tool like a paintbrush and it is your hands, eyes and brain that make it work. My point here is that in my opinion you are much better off to invest your additional $$$ in books, photo work shops, classes or post processing software.

Much of what I have learned up to this point has been from books and attending photo work shops and various classes.

Some helpful books I can suggest are:

All books by Bryan Peterson many of which are available at the Palm Beach County Library. His books are written in an easy to understand format without getting too technical.

For Black & White photo techniques and processing I can recommend From Oz to Kansas: Almost Every Black and White Conversion Technique Known to Man by Vincent Versace

Books by Scott Kelby are great sources for knowledge and techniques.

Books by Nicole S Young are inspirational and have great tips on improving your photography.

Books by Moose Peterson which is a great wildlife photographer.

There are lots more great books these are just a few that have been helpful to me in my photographic journey.

” it’s more than just the gear it is also what’s between your ears that can make a great difference in your photography”

~Steve