Hello LCC Members,
There have been a few members asking about ON1 Photo Raw 2017
Here’s a link to a page that has helpful videos and FAQ
https://www.on1.com/blog/category/product-training/photo-raw/getting-started-with-photo-raw-2017/

Hello LCC Members,
There have been a few members asking about ON1 Photo Raw 2017
Here’s a link to a page that has helpful videos and FAQ
https://www.on1.com/blog/category/product-training/photo-raw/getting-started-with-photo-raw-2017/
Hello LCC Members,
Here is a video about ON 1 Photo Raw 2017
Hello LCC members,
If you missed Part 1 This is the link
If you missed Part 2 This is the link
In this post I will show an example of using bracketed photos to create a HDR image.
I know, you may be saying HDR looks awful there is a glow around the edges and the colors look like a cartoon.
Yes, it can look that way if that is what the photographers artistic intentions are and that’s ok. I myself do not like my images to look like a cartoon but keep an open mind when viewing others work.
The first step is to set your camera to aperture priority there a post here aperture priority.
The second step set your camera to bracket exposure if you do not know how to you will need to consult your camera manual. Photomatix Pro suggests a bracket of 3 shots spaced at -2 0 +2
But, if your are using a camera that supports 1/3 Stop increments. I suggest between 5 and 9 shots spaced 1/3 stops apart.
Yes, by all means shoot in RAW not JPG
With your camera on a tripod shoot away.
Heres an example that is 5 shots spaced 1/3 stop ( -2/3 -1/3 0 +1/3 +2/3 )
Click on the gallery below ↓ to view the images larger.

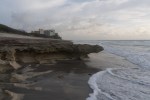
Below ↓ is the result out of Photomatix Pro
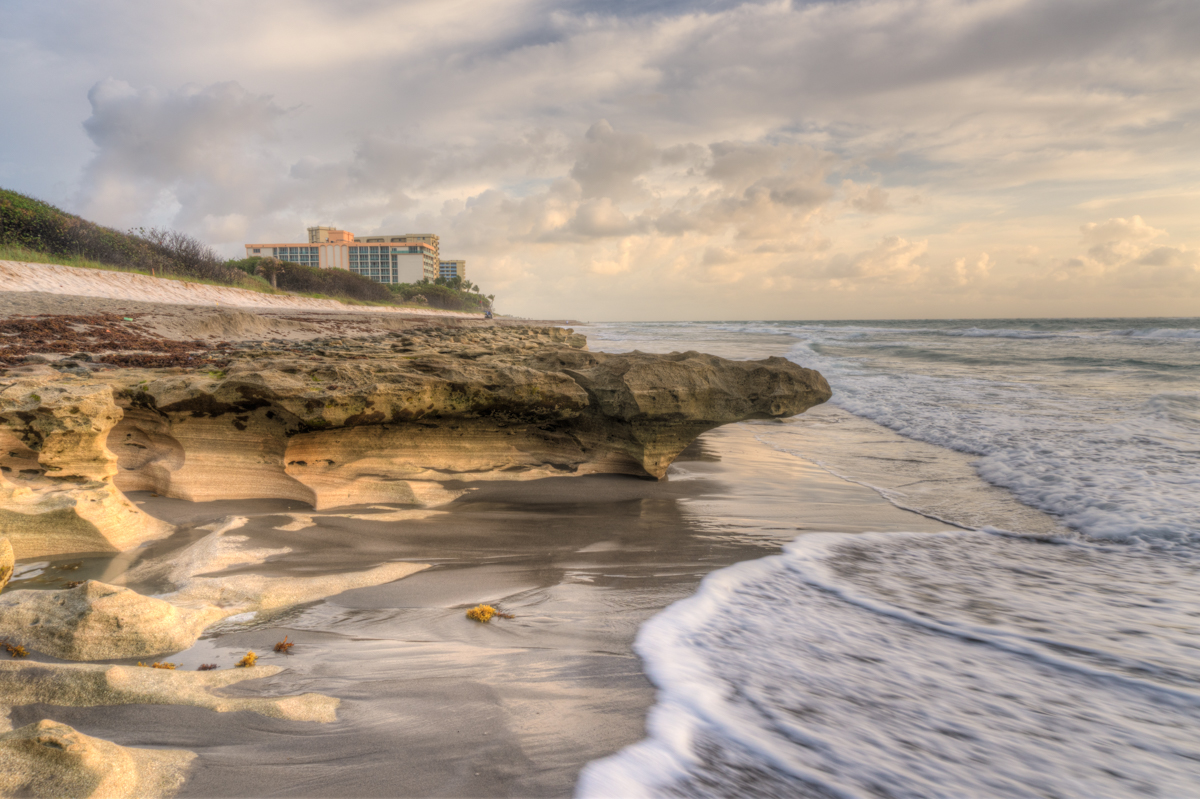
No other adjustment have been made yet other than blending the exposures with Photomatix Pro.
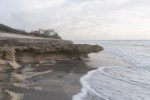
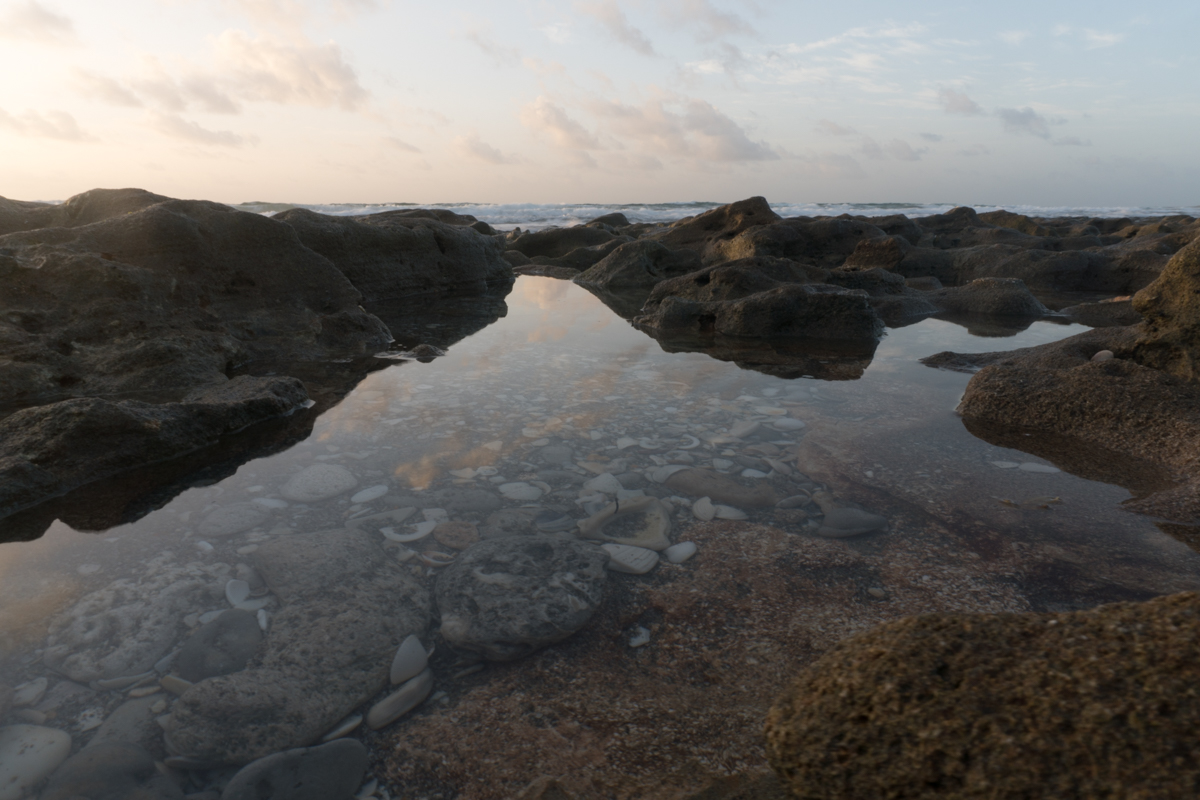
Below ↓ is the result out of Aurora HDR

In this image look at the foamy tide line front of image center. Aurora did not do as good a job de-ghosting the image. This is why there are two partial foamy lines in front of the main one.
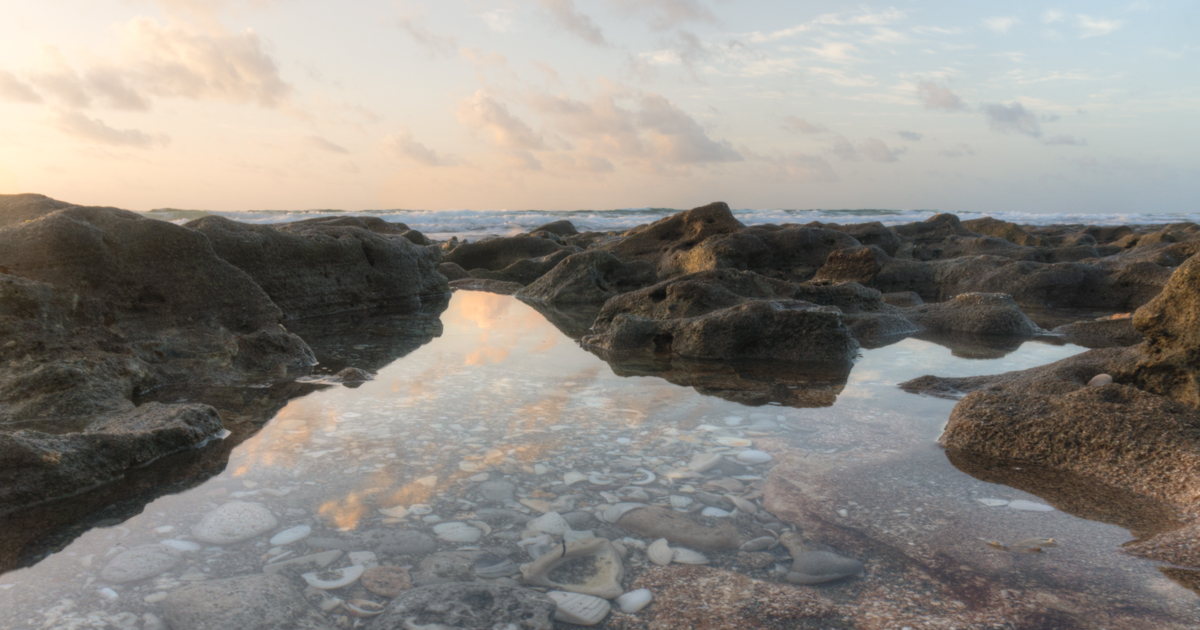
I decided to use the image blended by Photomatix Pro in this case because of little to no ghosting.
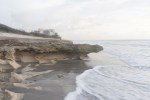
I then sent the image to ON1 Raw and used the effects module.
Below ↓ is the result out of ON1 Raw

The Effects used were Dynamic Contrast, Sharpening, Clarity and a small touch of Grunge.
If any members are interested in a class or a demo of post processing please let me or one of the other club board members know.
Steve
Comments or questions please leave them below.
Hello LCC members,
Here is Part 2 if you did not see Part 1 here’s the link
In this post I will show you examples of my workflow with short explanations.
To start off here is a RAW image Straight Outta Camera “SOC”
Technical Info, for those that need to know : Camera Sony A6500 ISO 100, 16mm , f22, 1/8 sec Handheld, Low Perspective
The first thing I did to the image was straighten and crop it.
The image is still in RAW some photographers like to do the crop and straighten as a last step but you can do this in any order you want to there are no rules. This is your art and vision for your image.
Next step is to use either Lightroom or other software to process the RAW photo.
The software I used on this photo was ON1 Photo RAW 2017
Here is the photo after processing

In On1 Effects I used the following Dynamic Contrast, Sharpen, Clarity and Color
Heres the Before and After


If you have any questions or would like the club to have a class on this or other post processing software let us know.
In my next post I will show examples using HDR techniques and will explain it from start to finish.
Steve

