Six Ways to Draw The Eye to a Specific Subject -From thephoblographer.com site
1

Great article with tips on entering photo contests from http://improvephotography.com
Here is a great video series by Eastman House which covers the history of the photographic process. It is a 12-Part Video Series each video is about 6-minutes long.
Hi LCC Members,
Last Sunday Bill Clifton was at wakodahatchee wetlands here is his report ” Not a lot going on Mostly Cormorants & Great Blues building nests”.
A few of the images Bill shot.


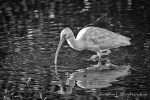
On Saturday I was down at Green Cay Wetlands quite a few Spoonbills, Egrets etc. and I also heard that there are Bobcats with kittens that have been showing up on a regular basis.
Here are a few of my photos from that day.


Here is a video tutorial that demonstrates Hard Light Vs. Soft Light I found at Learnmyshot.com
Hi LCC members,
You may be frustrated with learning how your camera works and setting the Aperture (AV), Shutter Speed (TV) or ISO and not sure what they do to an image. These were discused in previous posts here are the links in case you missed it.
And the Holy Grail of Photography the Exposure Triangle
Here is a good ebook by Anderw S Gibson Mastering Photography: A Beginner’s Guide to Using Digital Cameras covers the basics of using your camera. I have read myself, it is easy to understand without double speak and complicated terms.
Ok, your beyond the basics and have mastered your camera settings but your feeling like the well of creativity has run dry. I to get into a place where inspiration has gone on holiday. The best cure for that is to find some photography books with new techniques or simply have material your interested in learning.
Here are a few e-books I have recently discovered and recommend for expanding your photographic vision.
The Visual Imagination by David duChemin
Book Description
Ideas and Techniques for Creative Photographic Expression
Let your camera and your creativity out of the box! Our cameras do amazing things, but since the beginnings of this craft, we’ve leaned heavily towards illustrative and literal interpretations of the world around us. Freed from the need to be so literal, we can create photographs that are beautifully expressive.
The Visual Imagination, Ideas & Techniques for Creative Photographic Expression is about that expression. Whether you want to make abstract or impressionist photographs or just need a bit of a break, this eBook has been written to help you explore the possibilities of the camera when we allow ourselves to slip out from under the thumb of the rules and the constraining ideals of so-called technical perfection. It wasn’t that long ago that painters freed themselves from a similar constraint and gave us the gift of Impressionism and the subsequent movements.
DRAWING THE EYE by David duChemin
Creating Stronger Images Through Visual Mass
E-Book Description
Drawing The Eye is about understanding and using the ways in which the eye reads a photograph in order to create more powerful images, and it’ll change the way you look at your craft. Broken into 4 parts, Drawing The Eye looks at this concept of visual mass, or visual pull, in Concept, in Camera, in Post-processing, and then through Creative Exercises related to each of these sections.
Don’t let the egghead title fool you, this is not academia; it’s a real-world discussion about making images that are more powerful because they’re made with a fuller understanding of where the eye moves in an image, and how that understanding can change the way you shoot and process your images.
BOKEH: CREATING WITH SHALLOW DEPTHS EBOOK BY CHRISTOPHER O’DONNELL
E-Book Description
Bokeh: Creating with Shallow Depths is an eBook written to inspire photographers to think beyond the confines of a deep depth of field. It’s focused on guiding landscape photographers of all levels to widen their aperture and see the environment as light and shapes, and to create abstract, ethereal images that have a deeper meaning and interpretation.
By using a shallow depth of field and thin slices of focus, you can completely transform a landscape, manipulating an environment that usually can not be changed or controlled. You can create a complex or simple photograph by changing your depth, and this extensive guide can show you how.
These are just a few to get you started there are many, many more e-books out there and the prices range from $5 and up. Some e-book authors even include video tutorials in the e-books which are an added bonus.
P.S.
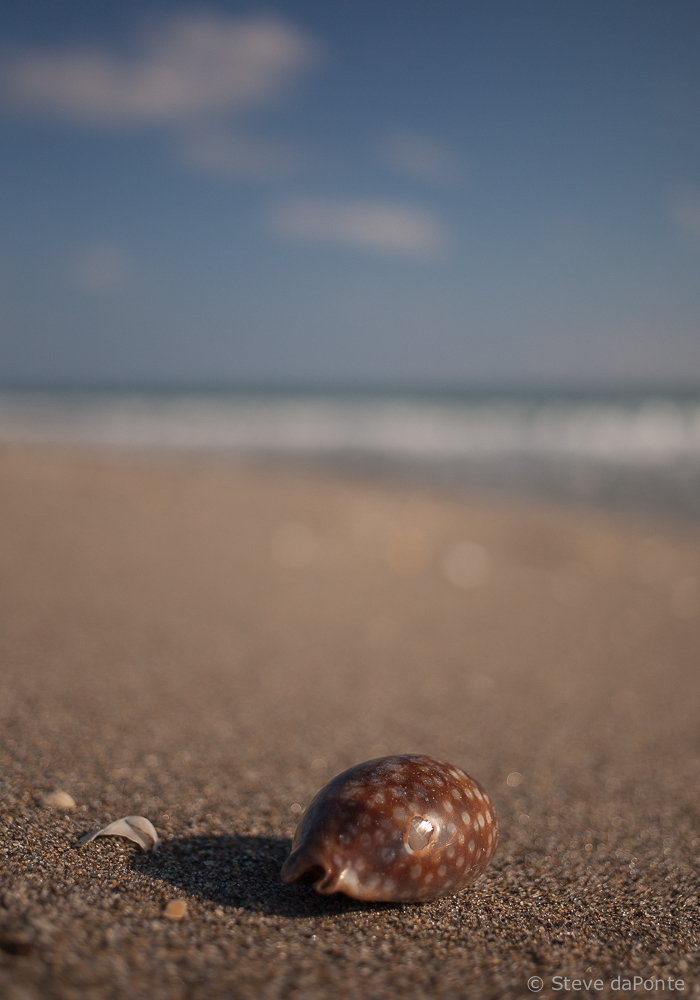
Here are a couple images I shot yesterday using a 40mm prime lens set at f2.8, practicing the techniques that are discussed in:
BOKEH: CREATING WITH SHALLOW DEPTHS EBOOK BY CHRISTOPHER O’DONNELL

Hello LCC members,
This question “what type of photo paper should I print my photo on?” has been asked by many of the members. This opens up a whole set of other questions. The first and most important question is, “what is your intent and vision for the presentation of the image?”.
There is no right or wrong answer to the question only your vision as a photographer can determine what paper or other material it is printed on.
A few words of advice
Note: You should also ask yourself, where (environment) and how (framed or in a photo album) am I going to display the printed image.
POPULAR BASIC TYPES OF PHOTO PAPER
High Gloss
Delivers a “studio finish” with the most vivid colors, an outstanding contrast of light and dark, and high durability. With this finish you may experience glares
in certain lighting situations and fingerprints similar to the glossy finish.
Glossy
Offers tremendous color range, resolution and durability. With this finish you may experience glares in certain lighting situations, fingerprints and are easily scratched. The most practical uses for these Glossy prints are portfolios, photo albums and other displays behind plastic.
Metallic
A metallic finish has a very high gloss, and the colors appear to be quite intense, but in a pleasant way. When you print on its reflective silver surface with color images, the results replicate metallic inks. Or, print black ink and the results are dramatic shades of reflective light. Although normally more expensive, a metallic finish can provide a vibrant “pop” to images. With this finish you may experience glares in certain lighting situations, fingerprints and are easily scratched.
Satin or Semi-Glossy
Offers a great compromise between a Matte and Glossy finish. Helps to reduce issues with glare, dust and fingerprints. Durability (paper weight/ thickness) typically falls right in the middle. Great for your everyday picture frames and ideal for those with a matte border.
Matte
This finish is designed to not show those pesky lighting reflections or fingerprints you often see on glossy prints. With less dynamic range and contrast of colors than all of
the other photo papers. Great for scrapbooking projects, bulletin boards, cards and invitations.
Quick Tip:
Order the various types of photo paper above in the smallest size i.e. 4 x 6 and print your image on each type of paper and see which one suits your vision.
LINKS WITH MORE INFORMATION
Here is a link for more in-depth information about Photo Paper Properties
Links to photo paper sample packs (note: most companies charge a small fee for these sample packs)
Red River Sample Packs – I currently use Red River Paper and it is great!
Epson Photo Papers and Printers – I currently use an Epson Stylus Photo Printer Model R1900 Which has been replaced by the R2880
Canon Photo Papers and Printers
Canson Infinity Fine Art Paper
Kodak Professional Paper and Materials
Injet Comparison, Ratings & reviews from Freestyle Photographic Supplies
Hello LCC members,
With the upcoming exhibit at the PBSC Eissey Theater here are some helpful tips about frames and mats.
I purchase my frames and mats from Jerry’s Artarama. They have a local store but they stock limited size choices. They also have an in house framing dept that can make custom sizes and cut custom mats.
I have always ordered them online and they typically arrive in about a 7-10 Days. Jerry’s customer service is excellent!
Here are the Links to the Frames and Mats I buy. It is really simple to pick the frame and mat you need for the frame with the handy size charts. Just remember to pick the frame color first then find the size you need for your photo print size i.e 8 x 10, 11 x 14, 13 x19 etc.
Link to the Page with the Frames I use Ambiance Gallery Wood Frames
Link to the Page with the Mats I use Ambiance Conservation Mat Board
-Steve